I wanted to customize the SharePoint News out-of-the-box web part so I re-created it with some of the features I wanted. The web part gets the SharePoint News Posts from a SharePoint site or multiple SharePoint sites and displays them in one of two styles. The styling of my web part is based off of the SharePoint News web part ( width, shadow, etc. )
The main features I wanted to add were the comment count, number of likes, and the pagination ability of the web part.
The web part includes:
Pagination ( Back/Next ) and Page number
Select Multiple Sites ( Defaults to the current site )
Creating custom list templates is now possible to create both custom document libraries and lists although official microsoft documentation has not specified anything about supporting custom document library templates.
This article explores the option how to use a combination of list design and PowerShell script to provision multiple instances of document libraries using a CSV file and how to create a document library from a custom list template from UI. Although cmdlet Invoke-SPOList Design is not in the official documentation yet. I tried to submit a pull request to include it in their documentation but was eventually closed because they can accept submissions from Microsoft Employees. Below is a snippet of the cmdlet definition.
# Invoke-SPOListDesign

## SYNOPSIS

Applies a published list design to a specified site collection. The supported list templates you can apply a list design to include: "modern" team site with M365 group, "modern" team site without an M365 group, communication site, classic team site, and classic publishing site.

## SYNTAX

```powershell
Invoke-SPOListDesign
  [-Identity] <SPOListDesignPipeBind>
  -WebUrl <string>
  [<CommonParameters>]

```
## DESCRIPTION

Applies a published list design to a specified site collection.

## EXAMPLES

### Example 1

This example applies a list design whose script creates one list with content types, views and fields.

```powershell
Invoke-SPOListDesign -Identity 5b38e500-0fab-4da7-b011-ad7113228920 -WebUrl "https://contoso.sharepoint.com/sites/testgo"

```
### OUTPUT
```yaml
Title                                        OutcomeText Outcome
-----                                        ----------- -------
Create site column WorkAddress through XML               Success
Create site column _Status through XML                   Success
Create site column digits through XML                    Success
Create site column remarks through XML                   Success
Create site column workinghours through XML              Success
Create site column Progress through XML                  Success
Create content type Legal                                   NoOp
Add site column WorkAddress to content type                 NoOp
Add site column _Status to content type                     NoOp
Create content type test_210304                             NoOp
Add site column digits to content type                      NoOp
Add site column remarks to content type                     NoOp
Add site column workinghours to content type                NoOp
Add site column Progress to content type                    NoOp
Add site column _Status to content type                     NoOp
Create content type test_StatusComm                         NoOp
Add site column _Status to content type                     NoOp
Create content type test_11                                 NoOp
Add site column _Status to content type                     NoOp
Create or update library "test_ct"                       Success
Add list column "ActualWork"                             Success
Add list column "Initials"                               Success
Add list column "_Status"                                Success
Add list column "digits"                                 Success
Add list column "remarks"                                Success
Add list column "workinghours"                           Success
Add list column "Progress"                               Success
Add list column "_Comments"                              Success
Add list column "TriggerFlowInfo"                        Success
Add list column "SelectFilename"                         Success
Add content type "Document"                                 NoOp
Add content type "Folder"                                   NoOp
Add content type "Legal"                                 Success
Add content type "test_210304"                           Success
Add content type "test_StatusComm"                       Success
Add content type "test_11"                               Success
Add view "All Documents"                                 Success
Add view "All Documents sorted"                          Success

```

## PARAMETERS

### -Identity

The ID of the list design to apply.

```yaml
Type: SPOListDesignPipeBind
Parameter Sets: (All)
Aliases:
Applicable: SharePoint Online
Required: True
Position: Named
Default value: None
Accept pipeline input: False
Accept wildcard characters: False

```

### -WebUrl

The URL of the site collection where the list design will be applied.

```yaml
Type: String
Parameter Sets: (All)
Aliases:
Applicable: SharePoint Online
Required: True
Position: Named
Default value: None
Accept pipeline input: False
Accept wildcard characters: False
```


### CommonParameters
This cmdlet supports the common parameters: -Debug, -ErrorAction, -ErrorVariable, -InformationAction, -InformationVariable, -OutVariable, -OutBuffer, -PipelineVariable, -Verbose, -WarningAction, and -WarningVariable. For more information, see [about_CommonParameters](https://go.microsoft.com/fwlink/?LinkID=113216).


## INPUTS

### Microsoft.Online.SharePoint.PowerShell.SPOListDesignPipeBind

## OUTPUTS

### System.Object

## NOTES

## RELATED LINKS

Getting started with [SharePoint Online Management Shell](/powershell/sharepoint/sharepoint-online/connect-sharepoint-online?view=sharepoint-ps).
First we can create a list design for our library based on an existing configured document library with custom content types, fields and views.
Create a List design for the document library using Get-SPOSiteScriptFromList and Add-SPOListDesign
From the UI , the list design for the custom library is available when clicking on New >List and selecting the tab “From your organization” under “Templates”
Click on the custom list design to select it , click on “Use Template” button and enter a name and optionally a description for the library.
Once “Create” is clicked the library is created with the relevant views , content types and fields.
That’s great that we can create a document library using the custom list/library template, however there are some settings like versionings , indexed columns, permissions, etc.. which are not included in the list design template.
I have used a PowerShell script with the cmdlet Invoke-SPOListDesign to apply the site design recursively to create multiple instances of the document library updating the internal name and display name based on the csv file and update the settings like creating indexed columns and setting versioning.
[CmdletBinding()]
    Param(
    [Parameter(Mandatory=$false,  Position=0)]
    [String]$adminSiteUrl = "https://contoso-admin.sharepoint.com",
    [Parameter(Mandatory=$false,  Position=1)]
    [String]$siteUrl =  "https://contoso.sharepoint.com/sites/investment",
    [Parameter(Mandatory=$false,  Position=2)]
    [String]$librariesCSV =  "C:\Scripts\DocumentLibraryTemplate\libraries_1.csv",

    [Parameter(Mandatory=$false,  Position=4)]
    [String]$listDesignId = "5b38e500-0fab-4da7-b011-ad7113228920" # use Get-SPOListDesign to find the Id of the list design containing the document library template
  )
#creating indexed columns might help with performance of large libraries, i.e. >5000 files
function Create-Index ($list, $targetFieldName)
{
  $targetField = Get-PnPField -List $list -Identity $targetFieldName
  $targetField.Indexed = 1;
  $targetField.Update();
  $list.Context.ExecuteQuery();
}
Connect-SPOService $adminSiteUrl
Connect-PnPOnline -Url $siteUrl -Interactive
Import-Csv $librariesCSV | ForEach-Object {
Invoke-SPOListDesign -Identity $listDesignId -WebUrl $siteUrl
#Get library just created and update Internal name and display name
$lib = Get-PnPList -Identity "test_ct" -Includes RootFolder
while(!$lib)
{
 $lib = Get-PnPList -Identity "test_ct" -Includes RootFolder
 sleep -second 5
}
if($lib)
{
    $lib.Rootfolder.MoveTo($($_.InternalName))
    Invoke-PnPQuery
    #this will change library title
    Set-PnPList -Identity $lib.Id -Title $($_.DisplayName)
    #add list to quick launch
    Add-PnPNavigationNode -Title $_.DisplayName -Url $($_.InternalName + "/") -Location "QuickLaunch"
    #enable versioning on the library
    Set-PnPList -Identity $lib.Id -EnableVersioning $True -EnableMinorVersions $True -MajorVersions 500 -MinorVersions 10
    Write-host "`tSetting versioning to major/minor to :"$_.DisplayName
    Create-Index $lib "Created By"
    Create-Index $lib "Modified"
 }
}
Screenshot of the output running the script. OutPut
PS C:\Windows\system32> C:\Scripts\DocumentLibraryTemplate\ApplySiteDesignToCreateLibaries.ps1

Title                                        OutcomeText                            Outcome
-----                                        -----------                            -------
Create site column WorkAddress through XML                                          Success
Create site column _Status through XML                                              Success
Create site column digits through XML                                               Success
Create site column remarks through XML                                              Success
Create site column workinghours through XML                                         Success
Create site column Progress through XML                                             Success
Create content type Legal                                                              NoOp
Add site column WorkAddress to content type                                            NoOp
Add site column _Status to content type                                                NoOp
Create content type test_210304                                                        NoOp
Add site column digits to content type                                                 NoOp
Add site column remarks to content type                                                NoOp
Add site column workinghours to content type                                           NoOp
Add site column Progress to content type                                               NoOp
Add site column _Status to content type                                                NoOp
Create content type test_StatusComm                                                    NoOp
Add site column _Status to content type                                                NoOp
Create content type test_11                                                            NoOp
Add site column _Status to content type                                                NoOp
Create or update library "test_ct"           List with name test_ct already exists.    NoOp
Add list column "ActualWork"                 List with name test_ct already exists.    NoOp
Add list column "Initials"                   List with name test_ct already exists.    NoOp
Add list column "_Status"                    List with name test_ct already exists.    NoOp
Add list column "digits"                     List with name test_ct already exists.    NoOp
Add list column "remarks"                    List with name test_ct already exists.    NoOp
Add list column "workinghours"               List with name test_ct already exists.    NoOp
Add list column "Progress"                   List with name test_ct already exists.    NoOp
Add list column "_Comments"                  List with name test_ct already exists.    NoOp
Add list column "TriggerFlowInfo"            List with name test_ct already exists.    NoOp
Add list column "SelectFilename"             List with name test_ct already exists.    NoOp
Add content type "Document"                  List with name test_ct already exists.    NoOp
Add content type "Folder"                    List with name test_ct already exists.    NoOp
Add content type "Legal"                     List with name test_ct already exists.    NoOp
Add content type "test_210304"               List with name test_ct already exists.    NoOp
Add content type "test_StatusComm"           List with name test_ct already exists.    NoOp
Add content type "test_11"                   List with name test_ct already exists.    NoOp
Add view "All Documents"                     List with name test_ct already exists.    NoOp
Add view "All Documents sorted"              List with name test_ct already exists.    NoOp
Annual Reports1
	Setting versioning to major/minor to : Annual Reports1
Screenshot of the libraries created from UI (TestCreatingFromUserInterface) and the others created via script (Annual Reports, Audit, Credit Risk and Purchase Orders)
The custom template for list/library can save a lot of time deploying standardised lists/document libraries without having to manually configure views, fields and content types.
However the script kept failing at irregular intervals with exception messages like “A task was cancelled”, “The collection has not been initialised” and “operation time out”. It was a long processing task which I need to keep monitoring and resumed the script manually to continue the deletion many times to my dismay. What I thought was a simple task ended being so tedious. I still needed a script which can delete 300k items without stopping each time an error is encountered due to throttling issue, token expiring or network connectivity issues.
I used the PnPBatch to add/delete 1 k items at one time as there is a limit on the number of operations that can be passed as part of PnPBatch
$action = Read-Host "Enter the action you want to perform, e.g. Add or Delete"
$siteUrl = "https://contoso.sharepoint.com/sites/Team1"
$listName = "TestDemo"
$ErrorActionPreference="Stop"
Connect-PnPOnline –Url $siteUrl -interactive


$Stoploop = $false

[int]$Retrycount = "0"


write-host $("Start time " + (Get-Date))
do {
try {

if($action -eq "Add")
{   $lst = Get-PnPList -Identity $listName

    if($lst.ItemCount -lt 300000)
    {
       $startInc = $lst.ItemCount
       while($lst.ItemCount -lt 300000)
       {

       $batch = New-PnPBatch
        #perform in increment of 1000 until 300k is reached
       if($startInc+1000 -gt 300000)
        {
         $endNu = 300000
        }
        else
        {
        $endNu = $startInc+1000
        }
        for($i=$startInc;$i -lt ($endNu);$i++)
        {
            Add-PnPListItem -List $listName -Values @{"Title"="Test $i"} -Batch $batch
        }
        Invoke-PnPBatch -Batch $batch
         $lst = Get-PnPList -Identity $listName
       }
    }
}

if($action -eq "Delete")
{
 $listItems= Get-PnPListItem -List $listName -Fields "ID" -PageSize 1000
$itemIds = $lisItems | Foreach {$_.Id}

$itemCount = $listItems.Count
while($itemCount -gt 0)
{
    $batch = New-PnPBatch
    #delete in batches of 1000, if itemcount is less than 1000 , all will be deleted

    if($itemCount -lt 1000)
    {
     $noDeletions = 0
    }
    else
    {
     $noDeletions = $itemCount -1000
    }

    for($i=$itemCount-1;$i -ge $noDeletions;$i--)
    {
        Remove-PnPListItem -List $listName -Identity $listItems[$i].Id -Batch $batch
    }
    Invoke-PnPBatch -Batch $batch
    $itemCount = $itemCount-1000
}

}

Write-Host "Job completed"

$Stoploop = $true

}

catch {

if ($Retrycount -gt 3){

Write-Host "Could not send Information after 3 retrys."

$Stoploop = $true

}

else {

  Write-Host "Could not send Information retrying in 30 seconds..."

  Start-Sleep -Seconds 30

  Connect-PnPOnline –Url $siteUrl -interactive

  $Retrycount = $Retrycount + 1

  }
 }
}
While ($Stoploop -eq $false)
write-host $("End time " + (Get-Date))
The script took nearly 4 hours to create 300k items in a SharePoint list with calling retry once.
The script took 7.5 hours to delete 300k items calling the retry twice.
In SharePoint Online when a team site is automatically created, the Site Members and Site Owners SharePoint groups are created by default with Edit and Full Control permissions. However the permissions levels of Site Members can not be edited from its default Edit value to Contribute for example.
You can argue we can create a custom SharePoint group with contribute permissions to restrict users from being able to manage lists and libraries however users added to custom SharePoint groups won’t benefit from other services in M365 ecosystem like teams, mailbox, etc… The best practice using SharePoint team sites is to use the M365 groups to edit permissions for full collaboration experience using connected services like teams. This add challenges to business who would like to have controlled contribute access to site members.
Though it might not be best practice to edit out of the box permission levels like edit , full control, etc… Permissions levels can be edit on the classic advanced permission settings page. In the example below I have edited the OOB Edit permission level to exclude “Manage Lists” and remove it Edit_ExcludeManageLists.
It is not possible for M365 to change the permissions of members from Edit to Contribute to prevent deletion or uncontrolled creation of lists and libraries. The option to “Edit User Permissions” is greyed out.
One option would be to create a custom SharePoint Group for contributors but anyone added to the custom SharePoint Group would not be part of the M365 group which means they won’t be able to contribute via Teams or any other M365 services.
One undocumented approach is to rename the Edit role to “Edit without manage lists” and amend the permissions to remove the ability to create or delete lists and libraries.
Click on Permissions Levels from the classic advanced permissions page
Click on Edit Permission
Update the Name to “Edit without manage lists” and uncheck “Manage Lists”
All users in the members group will be granted “Edit without manage lists” permissions.
The list view threshold is 5000 in SharePoint Online and still can not be changed despite it has been raised in the User Voice for improvements.
I have created more than 5000 files in a library with the use of Power Automate to test what works and does not work.
I was surprised by navigating to the list or library I did not get any errors and everything seems to be working. However if I switch to classic view I get the message
“This view cannot be displayed because it exceeds the list view threshold (5000 items) enforced by the administrator. To view items, try selecting another view or creating a new view. If you do not have sufficient permissions to create views for this list, ask your administrator to modify the view so that it conforms to the list view threshold.”
Fortunately “exit the classic view” made the error disappear. Views exceeding the list view threshold of 5000 k work in the modern experience. As you filter and sort by a column , indexes are automatically created in the list indexed columns. In the screenshot below the Severity column has been added automatically when I was sorting the library using the column.
However automatic creation of indexes is limited to lists or libraries with less than 20 k items, otherwise you may encounter errors. In modern experience, automatic indexes are created with columns used for filtering and sorting in saved views or when sorting.
Also list view threshold error can happen if filtering or sorting by columns of type lookup, people and managed metadata.
“Note: Displaying 12 or more columns of the following types can cause a list view threshold error: people, lookup, and managed metadata. Displaying columns of other types will not. “
Managed metadata fields don’t provide the same look and feel as choice field type. It is quick clunky specially when there are a lot of terms displayed.
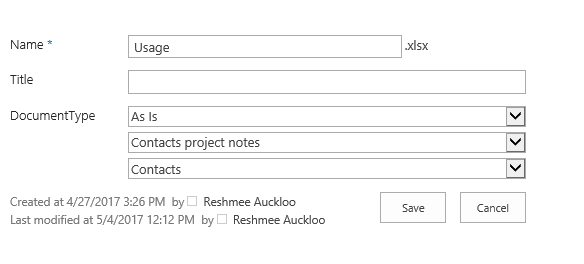
The requirement cropped up to display the managed metadata fields as drop downs. After googling for a while, stumbled on PnP sample Branding.JSLink solution which had an example how to achieve it. The solution is a no code sandboxed solution with different examples how to enrich fields. I wanted only the taxonomy to cascading drop down feature.
I copied the file TaxonomyOverrides.js and ManagedMetadata.js only into the “Style Library” library in my test SharePoint Site Collection. I modified the TaxonomyOverrides.js file to refer to the field “DocumentType” I wanted transformed in the fields section.
Type.registerNamespace(‘jslinkOverride’)
var jslinkOverride = window.jslinkOverride || {};
jslinkOverride.Taxonomy = {};
jslinkOverride.Taxonomy.Functions = {};
jslinkOverride.Taxonomy.Functions.RegisterTemplate = function () {
// register our object, which contains our templates
SPClientTemplates.TemplateManager.RegisterTemplateOverrides(jslinkOverride.Taxonomy);
};
jslinkOverride.Taxonomy.Functions.MdsRegisterTemplate = function () {
// register our custom template
jslinkOverride.Taxonomy.Functions.RegisterTemplate();
// and make sure our custom view fires each time MDS performs
// a page transition
var thisUrl = _spPageContextInfo.siteServerRelativeUrl + “Style Library/OfficeDevPnP/Branding.JSLink/TemplateOverrides/TaxonomyOverrides.js”;
RegisterModuleInit(thisUrl, jslinkOverride.Taxonomy.Functions.RegisterTemplate)
};
if (typeof _spPageContextInfo != “undefined” && _spPageContextInfo != null) {
// its an MDS page refresh
jslinkOverride.Taxonomy.Functions.MdsRegisterTemplate()
} else {
// normal page load
jslinkOverride.Taxonomy.Functions.RegisterTemplate()
}
The DocumentType is a taxonomy field which has SharePoint OOB look and feel
After referencing the files TaxonomyOverrides.js and ManagedMetadata.js on the editform page of the document library using a script editor webpart using tags as below.
Sometimes you may have to migrate data from one SQL database to another SQL database on another environment, e.g. Live to test and dev environment and vice versa.
You may argue the easiest solution is a migration of the backup of database. Unfortunately it does not work well in environments where data in Live is classified as sensitive and are not allowed to be copied across into a dev / test machine where the security is not as strict as a live machine. There are some data from live which are not classified as sensitive or restricted and might have to be migrated to Test and DEV for testing or development purposes, for example list of values.
A copy of the data can be exported as a csv or dat file from the SQL Table using “select * from table_value” statement from source database.
The data can be bulk imported into a temp table and MERGE statement can be used to insert missing records and update records. The sample script which you can use is below.
This file contains bidirectional Unicode text that may be interpreted or compiled differently than what appears below. To review, open the file in an editor that reveals hidden Unicode characters. Learn more about bidirectional Unicode characters
The versions property is not available from client object model on the ListItem class as with server object model. I landed on the article SharePoint – Get List Item Versions Using Client Object Model that describes how to get a list item versions property using the method GetFileByServerRelativeUrl by passing the FileUrl property. The trick is to build the list item url as “sites/test/Lists/MyList/30_.000” where 30 is the item id for which the version history needs to be retrieved. Using that information I created a PowerShell to loop through all lists in the site collection and sub sites to delete all version history from lists.
The script below targets a SharePoint tenant environment.
This file contains bidirectional Unicode text that may be interpreted or compiled differently than what appears below. To review, open the file in an editor that reveals hidden Unicode characters. Learn more about bidirectional Unicode characters